How to Edit a Squarespace Website: Updated 2025 Guide
Squarespace is one of the most popular website builders out there. Nearly 3 million websites have been built with Squarespace, accounting for about 5.9% of the global website builder market share. As a result, hundreds of people ask every single month, “How to edit a Squarespace website”.
You can make small edits to your website by simply using the edit button on the upper-left corner of the page content frame. However, you can also do more advanced website edits, such as changing the entire site template or making style changes to tweak the look and feel of your site.
In this guide, we’ll explore all you need to know about how to edit a Squarespace website, providing a step-by-step guide for making changes to your site and troubleshooting common issues you might experience while editing.
Discover more as the founder of SEOSpace guides you through optimizing your Squarespace website in the following video tutorial.
Understanding Squarespace's Interface
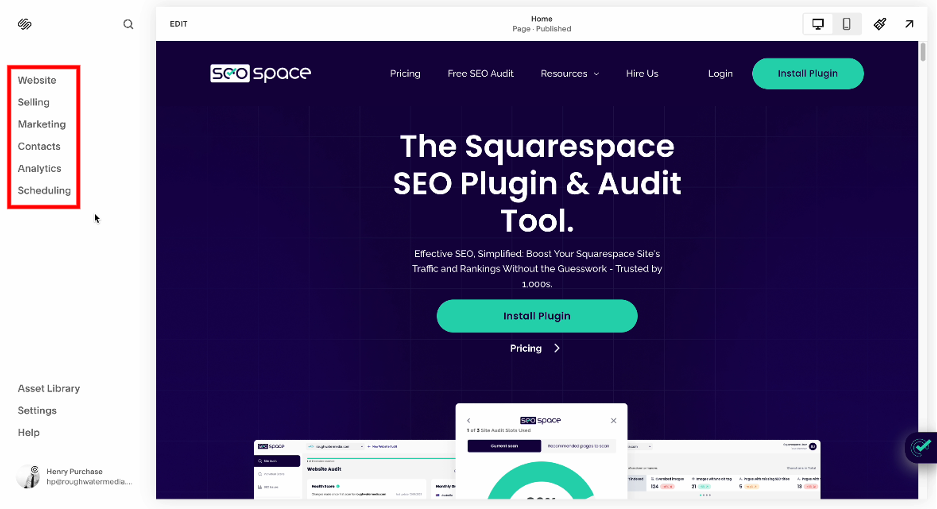
On the left side, we have the different sections.
Website: The website section acts as your control center for all page-related activities on your site. Here, you can select and edit existing pages or effortlessly add new ones, keeping your website dynamic and engaging.
Selling: Designed specifically for e-commerce integration, the selling section is your one-stop shop for setting up your online store. It allows you to add products, manage inventory, and configure your digital storefront for a smooth selling experience.
Marketing: The marketing section offers a comprehensive suite of tools dedicated to promoting your website. It provides everything you need to optimize for search engines (SEO), create compelling email marketing campaigns, and employ other promotional strategies to increase your site's visibility and reach.
Contact: The contact section consolidates all contact-related information, streamlining customer relationship management by bringing together contact forms, lead generation tools, and customer queries into a single, efficient interface.
Analytics: Squarespace's analytics provide detailed insights into visitor interactions, offering essential data for enhancing user experience and optimizing your website for improved engagement and conversion.
Scheduling: The scheduling section is invaluable for appointment-based businesses, offering a streamlined booking and management system that enhances customer experience and operational efficiency.
Asset Library: Located at the bottom of the panel, the asset library serves as the central repository for all website images, playing a crucial role in organizing and managing your site's visual elements for quick access and efficient use.
Settings and Help: The navigation panel concludes with settings for comprehensive site configuration and help for support and guidance, designed to aid in the fine-tuning of your site's settings and providing access to assistance whenever necessary.
A Guide to Squarespace Fluid Engine Editor
Squarespace is known for its clean and user-friendly interface, which has made it a popular choice for building websites both for beginners and pros. You can create and publish a Squarespace website from scratch using Squarespace Blueprint or choose from one of 800 editable templates on the platform. Moreover, if you want you can also hide any of your unwanted pages from navigation.
However, after picking a template and editing the placeholder content on the page to fit your brand, Squarespace also allows you to rearrange sections, add new ones, and edit website sections without stress using the built-in editor known as Fluid Engine.
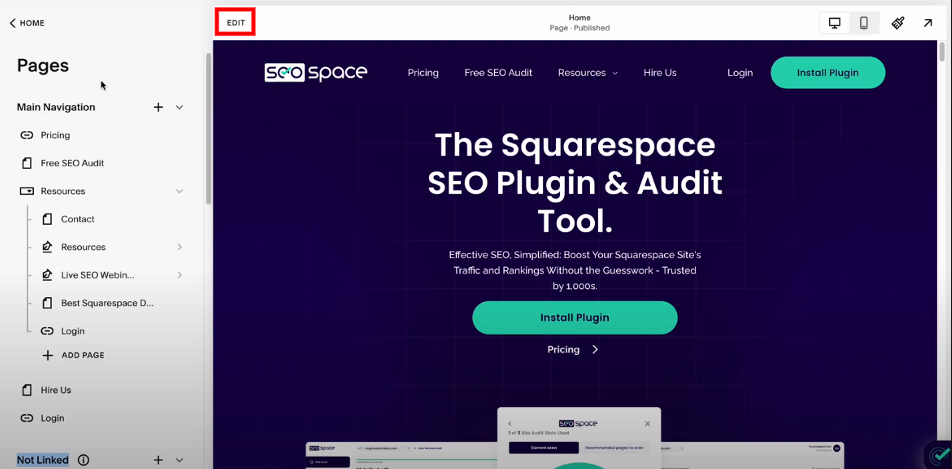
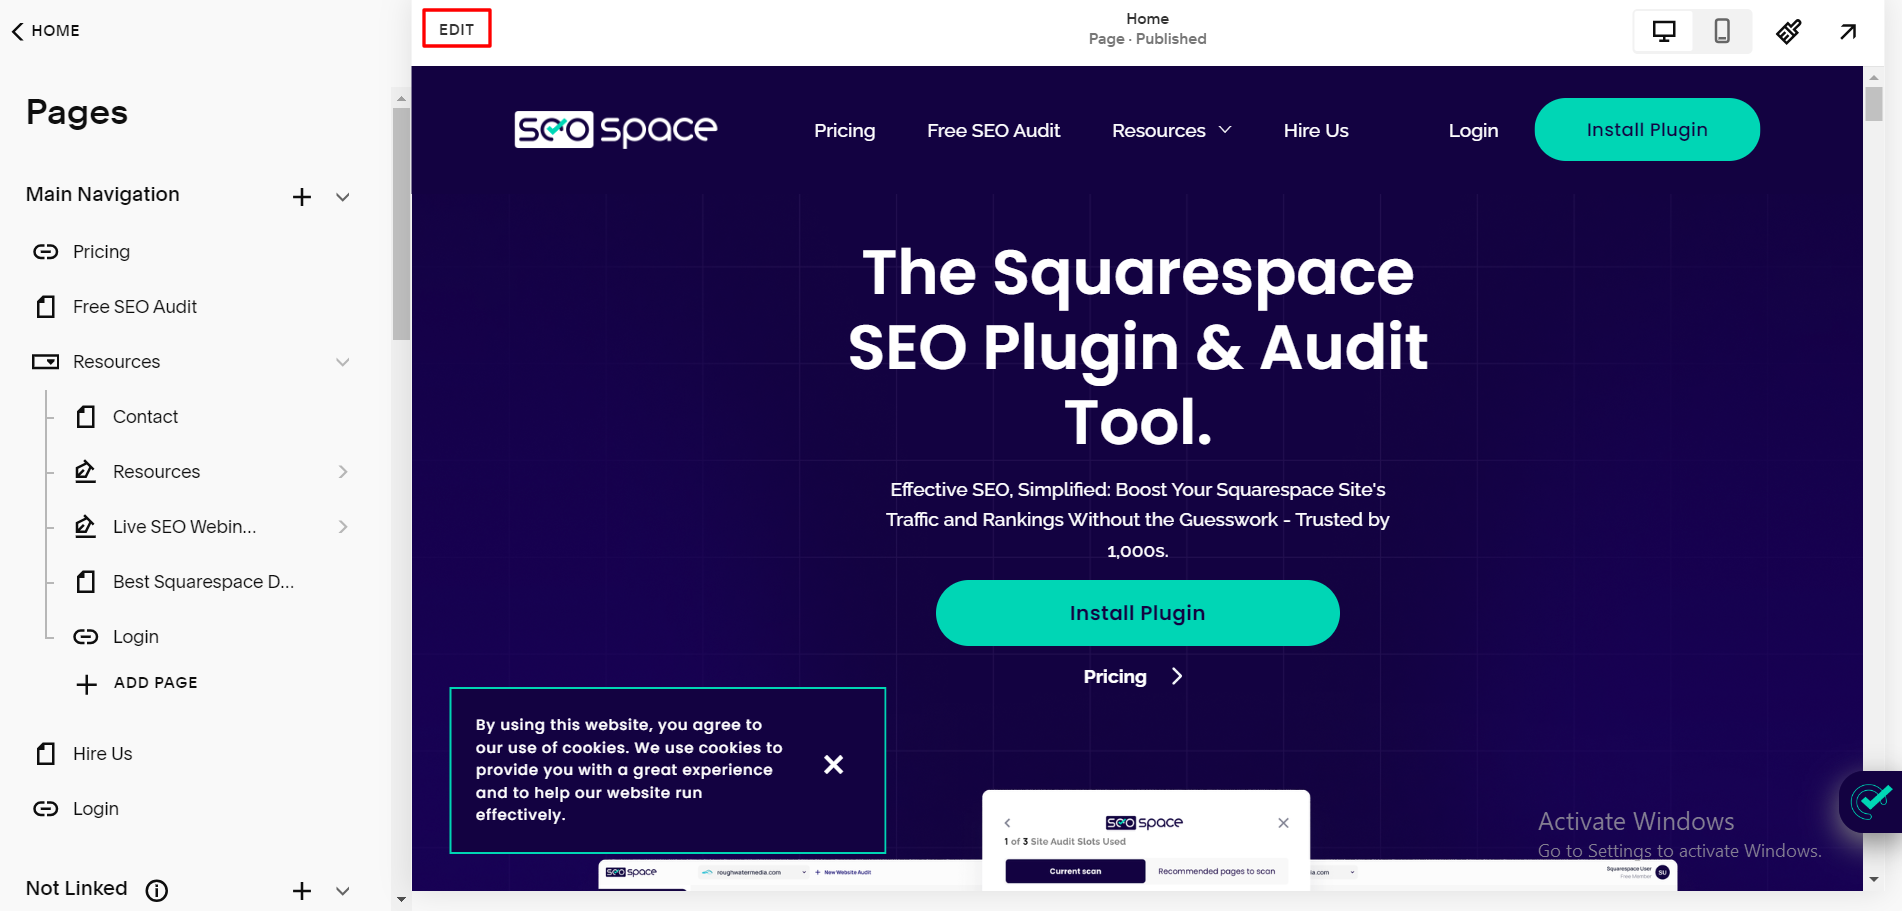
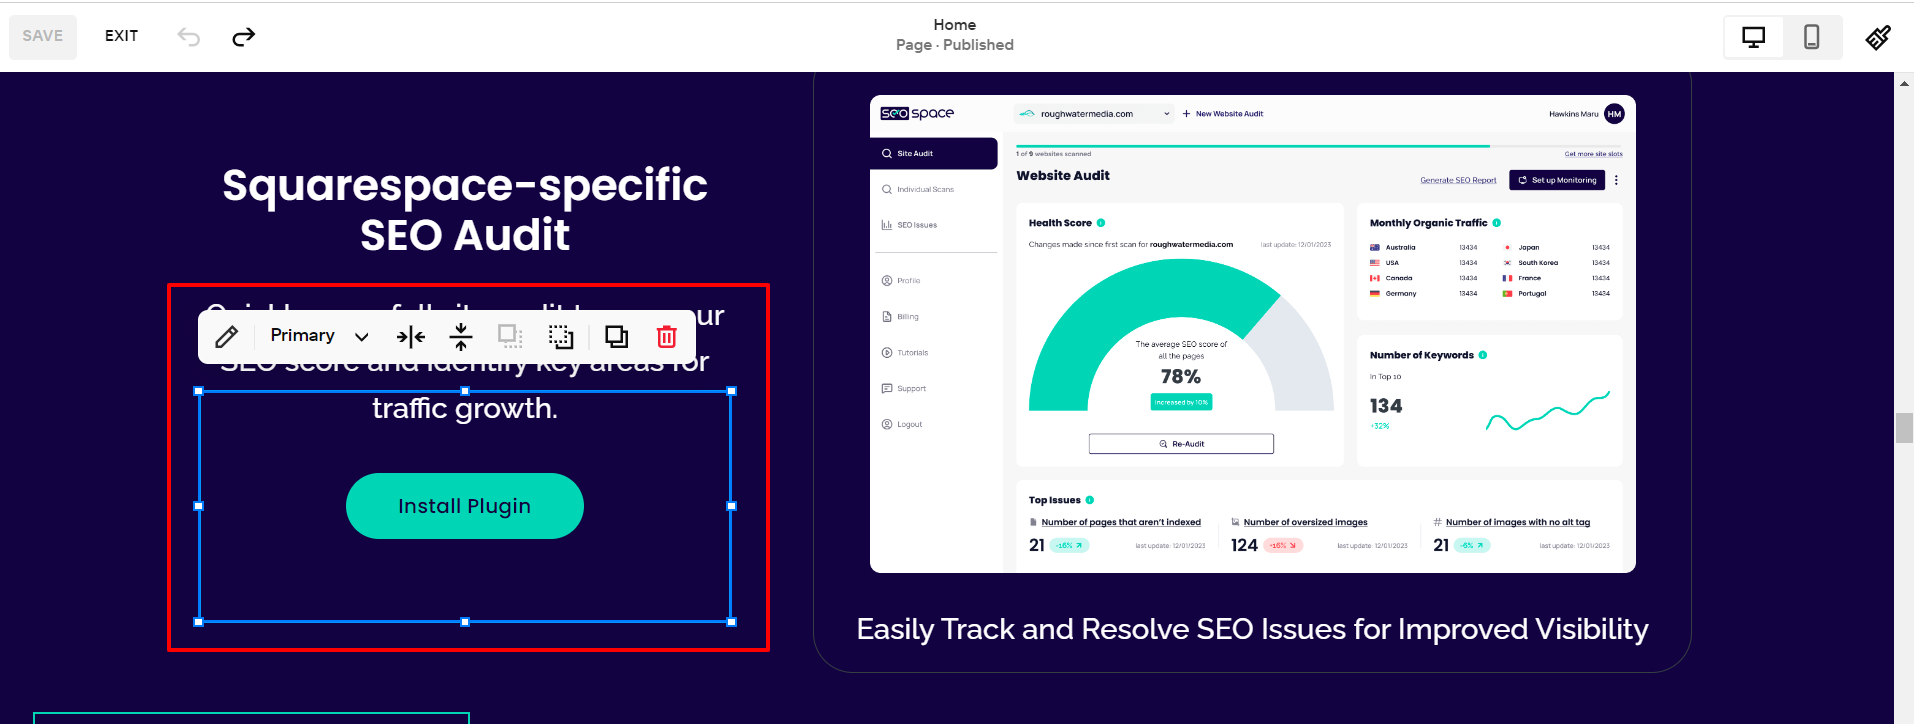
To switch to this editor mode, go to the specific page of your website that you want to edit and click the “Edit” button in the top-left corner of the page.
From here, you can drag and drop pre-designed sections (such as galleries, forms, text boxes, and images) in the content area of the website, which is the central section of the page.
You can also edit existing sections by simply hovering over them and clicking on the pen icon that appears on the screen. The interface also has a side panel that contains various editing options for any element you select on the page. This may include text formatting, image properties, section layout, and so on.
Squarespace offers a real-time preview of your edits, and you can see any changes you make reflect instantly on your website. The platform also prioritizes design. You can easily preview the appearance of your website on different screen sizes directly from the editor.
Reasons to Edit Your Squarespace Website
For most brands, the content of their website isn’t fixed or static. There are plenty of reasons why you might want to make changes to your Squarespace website after the initial design has been completed.
It’s always a great idea to edit your website to reflect the current real-world status of your business and adapt your website content to keep it fresh and relevant. Here are some of the major reasons you might want to edit your Squarespace website:
Add new products or services
If you have just launched a new product line or added a new service to your offerings, it makes sense to want to edit your website to include these changes. You can add new sections and pages to your existing website with eye-catching visuals and descriptions of the new products and services.
Make design changes
Sometimes, design changes may be necessary to reflect your current brand identity. This may involve changes to the style and color palette of your website, updating your logo, or changing your text fonts to maintain a consistent brand identity across all the platforms you use. Sometimes, brands also carry out design changes on their website to improve user experience, streamline navigation, or ensure mobile-friendliness.
Content refresh
You may also redesign your website to keep the content fresh and up-to-date. An occasional website redesign may be necessary to keep up with the latest industry trends, both in terms of site content and the latest design concepts. Just like fashion trends or home decor can go out of style, website owners may also need to make seasonal changes to their website based on what’s trending or what works better at the moment.
How to Edit a Squarespace website
Squarespace lets you tweak your website design to make small changes based on your website redesign goals. You can also do a complete overhaul, editing entire pages or redesigning your website. If you have come across questions like ‘how to edit the Squarespace site’ or ‘how to edit the site header Squarespace,’ don’t worry.
When editing a webpage on Squarespace, it's crucial to focus on four main areas that are fundamental to the site's structure and design. Understanding and utilizing these areas effectively will greatly build up your ability to create a compelling and user-friendly website. Here’s a step-by-step guide for making both minor and major changes to your website.
How to edit Squarespace website page content
To edit the content within your website page, here are the steps to follow.
Step 1: You’ll find an “Edit” button on the upper left-hand edge of the page content screen. Click this button to access the editor.
Step 2: From here, you can add new content or delete existing content to update your Squarespace website page content.
Step 3: When you’re done with the edit, click the “save” button to publish the updates you have made to the web.
Adding new sections
When editing a Squarespace webpage, it’s practical to consider four main areas that are critical for the structure and effectiveness of your site. The first of these areas is the concept that a Squarespace website is made up of sections.
Follow these steps to add a new section to your Squarespace website:
Step 1: Open the Fluid Engine editor by clicking the edit button at the top of the page.
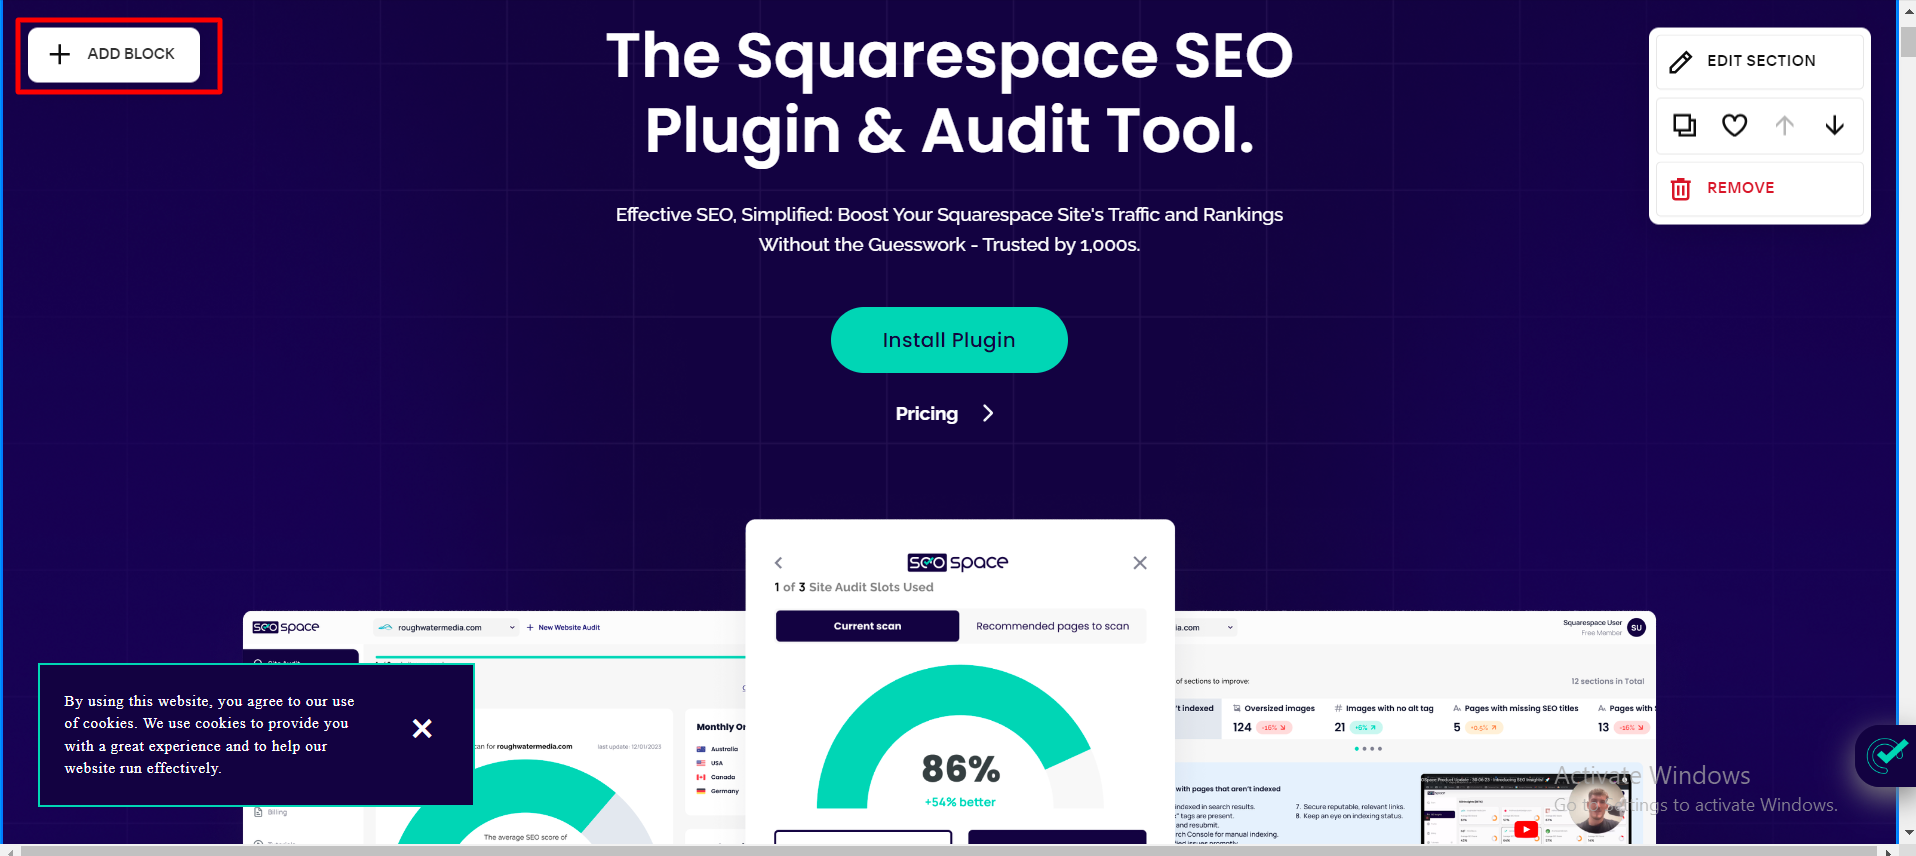
Step 2: Click the "+" button on the top-left edge of your screen to add a new section. The “+” icon also appears when you hover over an existing section of your website.
Step 3: You can choose from any of the predesigned section layouts or add a blank one that you can customize to your preference.
Step 4: You can also rearrange the existing sections by simply click-dragging and dropping them to reorder them on the page.
Step 5: Save the changes you have made to publish the new section.
Editing blocks
The second critical area to focus on when editing a Squarespace webpage is the blocks. Squarespace lets you add pre-designed content blocks to your website.
These blocks display different types of content on your site, such as text, images, buttons, and forms. You can edit both the content and design of a block by following these steps.
Step 1: Open the editor as explained in the steps above.
Step 2: Click the "Add Block" button on the top left corner of the page and select the type of block you’d like to add.
Step 3: You can resize and rearrange blocks by simply clicking and dragging them. It’s also possible to edit block settings by clicking the gear icon on each block. To edit a text block, for instance, click on the block to activate the inline editor. This allows you to change the font, color, style, or alignment of the text. Similarly, clicking on a button block will allow you to change the button color, resize it, or remove it completely if you want to.
Customizing site design and styles
Squarespace has a styles panel for changing the design or style of your entire site or a specific page of your site. To edit your site style, click on the brush button (site styles button) on the top-right corner of the screen.
From there, you can edit design settings like fonts, backgrounds, spacing, and colors of different elements on your site. You can also open the styles panel for specific sections of your website to edit individual style settings for that section.
Advanced editing
Squarespace has advanced editing features for developers. With these features, experienced users can add custom CSS code to their website to tweak the style and appearance to their preference. Click the “Design” menu to access a list of advanced editing functions. Note that this feature is only recommended for experienced developers and professionals.
Troubleshooting Common Editing Issues
Although Squarespace is generally easy to navigate, users may sometimes run into minor issues or complexities while trying to edit their site. For instance, you may want to edit an already published site while keeping your site operational or accessible to the public. Here are a few tips to navigate issues like this.
Editing a published page
To redesign or edit an already published page on your website, you can either duplicate the existing page or create a new page entirely from scratch. Doing this allows you to make edits on the duplicate version of the page (or the new page) while keeping the old page accessible to users until you’re ready to publish.
Duplicating the page before you edit is the ideal choice if the content on your old and new pages are similar and if you want to rearrange or make other small changes. However, if the changes are major, such as changing the entire template of your site, you can simply create a new page. When you’re done with the edits, simply delete the old page, then set the URL of the new page to that of the old page you deleted.
Editing an entire site without going live
Doing a complete overhaul of your website might take days or weeks. If you don’t want the public to see the changes you’re making on the site until you’re ready to reveal your designed site, you’ll have to redesign without going live.
The first option is to create a new site on your existing Squarespace account or duplicate your site entirely. You can then do the edits on the new sites without affecting the old site. When you’re done with the edits, move domains between the old and new sites and edit DNS settings so the URL points to your redesigned site. Of course, you’ll need some technical knowledge to use this option.
If you don’t have the technical skills for this, you can simply duplicate each page of your website individually and edit the duplicate before going live, as explained above.
Editing Page Settings
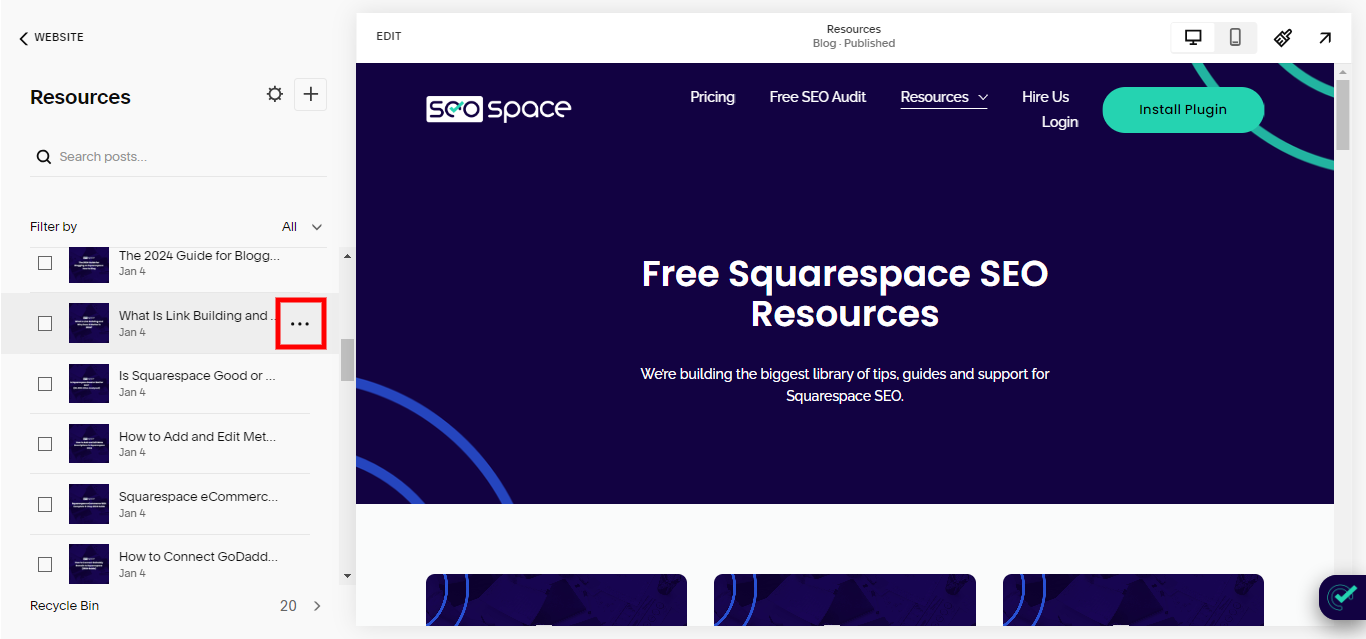
The third crucial area in the process of editing a Squarespace webpage involves editing your page settings. This area is accessible either through the settings menu or by clicking the three dots (ellipsis) associated with a specific page.
Here, you have the capability to customize various aspects of the page, such as adding feature images, editing the page's URL, and managing SEO settings.
The options section allows you to tag and categorize content, crucial for blogs, enhancing organization and searchability.
The SEO section is particularly vital as it influences how your page appears on search engines, potentially improving your site's ranking on Google.
It's important to note that these settings can vary depending on the type of page you are editing, whether it's a blog post or a standard webpage, each requiring a tailored approach to optimization.
Using Templates
The fourth area of editing or refining your Squarespace site is using template for a streamlined design process. By selecting a template when adding new pages—accessible via the '+' in the main navigation—you're given a variety of pre-designed layouts in a page layout section.
These templates are visually appealing and smartly designed to adapt to your site's existing color scheme. This means any template you choose will automatically sync with your website's colors.
Moreover, Squarespace's templates are carefully made to cater to a wide variety of needs. From contact, services, and team pages to RSVPs, FAQs, and even privacy policy sections, Squarespace allows you to add stunning layouts with these templates.
By using templates in your site design, you're not just adding pages; you're adding up the overall user experience and visual coherence of your website. Templates serve as a powerful starting point, allowing you to create professional, polished pages that upgrade your online presence.
Making sure search engines recognize your edits
If your website has been indexed by Google before editing, SEO crawlers will eventually pick up the changes you’ve made to your site. You can also notify Google of these changes manually by submitting your site URL for inspection using the Google Search Console. Alternatively, you can talk to an SEO professional for help in making your edits visible to search engines.
Best Practices for Editing Your Squarespace Website
Now that you already know how to edit the Squarespace website, it is time to maintain it. Editing your Squarespace website is simple, even for a beginner. However, to maintain the aesthetics and functionality of your redesigned site, there are a few things to keep in mind. They include:
Save your work regularly: As you redesign your website in editor mode, make sure you click the "Save" button in the top right corner periodically to avoid losing your website edits.
Use the undo/redo function: Sometimes errors happen when editing your site. Fortunately, Squarespace has an undo/redo function that lets you undo any changes you make to your site.
Preview your website before publishing: Squarespace has a "Preview" button that lets you see any changes before making them live.
Consult SEOSpace’s SEO tips: Optimizing your website for search engines is an important step in designing and redesigning your Squarespace site. Check out the detailed guides and tutorials on the SEOspace blog for tips on optimizing your Squarespace site.
Editing Your Squarespace Website FAQs
Can I edit my Squarespace website after publishing?
Yes, you can still edit your Squarespace website after it has been published. For small changes, you can edit your site and go live right away. You can also edit the site without going live until the full redesign is done by duplicating the page or creating a new page.
How to edit Squarespace's website after publishing?
Squarespace has an edit button on the top-left side of the screen. Click this button to open the site editor, from where you can edit entire sections or specific content blocks on your site. You can also click the “site style” button to make global style changes such as fonts, colors, spacing, and so on.
How do you edit the Squarespace website without going live?
To edit your Squarespace website without going live right away, duplicate your entire site or the specific page you want to edit. After editing, save the changes and delete the old page. Finally, edit the URL of the new page so it’s the same as that of the old page.
Conclusion
There are plenty of reasons for redesigning a completed Squarespace site. A website redesign might be a branding decision or an attempt to keep your website updated or easier to navigate for users. Regardless of the reason for such edits, redesigning a Squarespace website is relatively easy.
Squarespace’s editor mode allows you to edit website sections or add new ones. You can also make style changes or edit individual blocks of text, images, buttons, and so on. Feel free to experiment and explore your website to get the best designs possible and keep your website fresh. Just make sure you follow the best practices while doing such edits as highlighted above.


