Should I Switch From WordPress to Squarespace? (2025 Guide)
Are you contemplating switching your website from WordPress to Squarespace?
You’ve possibly heard that Squarespace’s user-friendly, intuitive platform is better suited to your needs. Let’s take a moment to explore whether the switch is worth it and how to make it.
We’ll begin by looking at how Squarespace (SS) stacks up against WordPress (WP) regarding flexibility, design options, and SEO capabilities. We’ll also examine some factors you should consider before switching.
Last but not least, we’ll provide you with a step-by-step guide on how to migrate WordPress to Squarespace so that you can take advantage of SS’s impressive features and functionalities immediately.
As a leading Squarespace SEO agency, we have made migrating from WordPress to Squarespace easier for you with this comprehensive guide. Read it till the end to explore everything you need to know about switching from WordPress to Squarespace.

Should You Remain With WordPress?
Switching from WordPress to Squarespace can be tempting, especially if you seek a more accessible platform to manage your website. However, before you decide, it’s crucial to re-examine the perks of sticking with WordPress.
WordPress offers great flexibility when customizing your website, making creating a unique look and brand easier.
WordPress has a vast selection of plugins and themes that can add functionality and improve the look of your website.
It can save you time and money that would otherwise be spent customizing and creating content from scratch.
WordPress is also much more SEO-friendly than Squarespace, since Squarespace doesn't offer much out-of-the-box in terms of SEO. For example, there’s a limit to using plugins and extensions on Squarespace compared to WordPress.
However, this wouldn’t be the case if you decide to switch to Squarespace today. SEOSpace’s brainchild, the feature-packed Yoast for Squarespace, offers substantial SEO benefits, allowing you to compete with WordPress sites for page #1 ranking on search engine results pages (SERPs).
There are other reasons why Squarespace is worth the switch, as we’ll examine in the next section. We also have a more in-depth guide comparing both website builders for SEO, as well as a video linked below.
Why Should You Switch to Squarespace?
Switching from WordPress to Squarespace offers several advantages for users seeking a sleeker, more intuitive website experience. For one,
Squarespace’s modern drag-and-drop editor (Fluid Engine) is easy to adapt to, allowing you to tweak page layout down to style options directly from your dashboard.
It makes it easier for a site owner new to website design to get up and running quickly with no coding experience required.
The Squarespace mobile app makes it easy to manage your site from anywhere.
With the platform’s decent SEO features and built-in analytics, you can ensure that your site is seen by potential customers — across all devices. This can get even better with our SEO plugin for Squarespace.
Squarespace’s expansive library of professionally designed templates makes it simple to create sites that look great on any device or screen size.
That said, if the sleek website-building interface and upgraded SEO game (with the best Squarespace plugins and extensions) Squarespace offers suit your needs, you can switch from WordPress to Squarespace.
Read our Squarespace pros and cons guide for a more encompassing view of this website builder’s perks and possible downsides.
Now that you’ve decided to carry out a WordPress to Squarespace import, the next thing to know is how to go about it. However, before we get to that, let’s outline what you should do to make your import seamless.
Preparing Your Content for Migration to Squarespace: A 4-Point Checklist
When doing a WordPress to Squarespace import, ensuring your content is ready for migration is essential. This will help prevent any unwanted surprises or errors when transferring your website.
Here’s what you should do before you begin the transition:
1. Check your site structure.
2. Optimize your content for SEO.
3. Redirect URLs.
4. Back up your site.
1. Check your site structure.
An essential part of migrating your website is ensuring your new Squarespace site follows the same structure as your current WordPress site. That way, you can maximize SEO benefits and keep visitors’ experiences consistent.
Note: Website structure, otherwise termed website architecture, refers to the order, organization, and hierarchy of your website’s pages outlined by a desired user experience. Your site structure may follow a matrix, sequential/linear, database, or hierarchical model.
2. Optimize your content for SEO.
Take time to ensure your existing content meets SEO requirements before transitioning.
To achieve this, you may do the following:
Use keywords in titles
Write meta descriptions with keywords
Format text appropriately with H1–H6 tags
This is only a sneak peek. See our 12-step Squarespace SEO checklist for a more exhaustive list.
3. Redirect URLs.
Keep track of the old URLs on WordPress and redirect them correctly to the new URLs on Squarespace. Otherwise, visitors may end up at a dead page (broken link) or one that looks completely different from what they expect. Broken links can affect user experience, increasing bounce rates, which, in turn, negatively impact rankings on SERPs.
4. Back up your site.
Finally, it’s always good practice to back up your site before switching platforms. Export any data from forms or contact info and store it safely in case something goes wrong during the migration process.
Don’t want to do it all yourself? No worries, you can hire the best Squarespace designers to get this done for you.
An 8-Step Guide to Importing WordPress to Squarespace
With that out of the way, you’re now set to transfer your website content from WordPress to Squarespace.
Here’s a step-by-step guide on how to switch from WordPress to Squarespace:
Create a Squarespace account.
Choose a Squarespace template.
Export the WordPress site.
Import WordPress content into Squarespace.
Review and edit imported content.
Customize your Squarespace site.
Transfer your domain from WordPress to Squarespace.
Launch your new Squarespace site.
Step #1: Create a Squarespace account.
To start the process of moving your WordPress website to Squarespace, the first thing you need to do is set up a Squarespace account.
Access the Squarespace website and sign up for a new account by clicking “GET STARTED.”
If you don’t already have an account, you must provide some basic information, such as your name and email address, to create one.
Once you’ve created your Squarespace account, you can move on to the next step of the migration process.

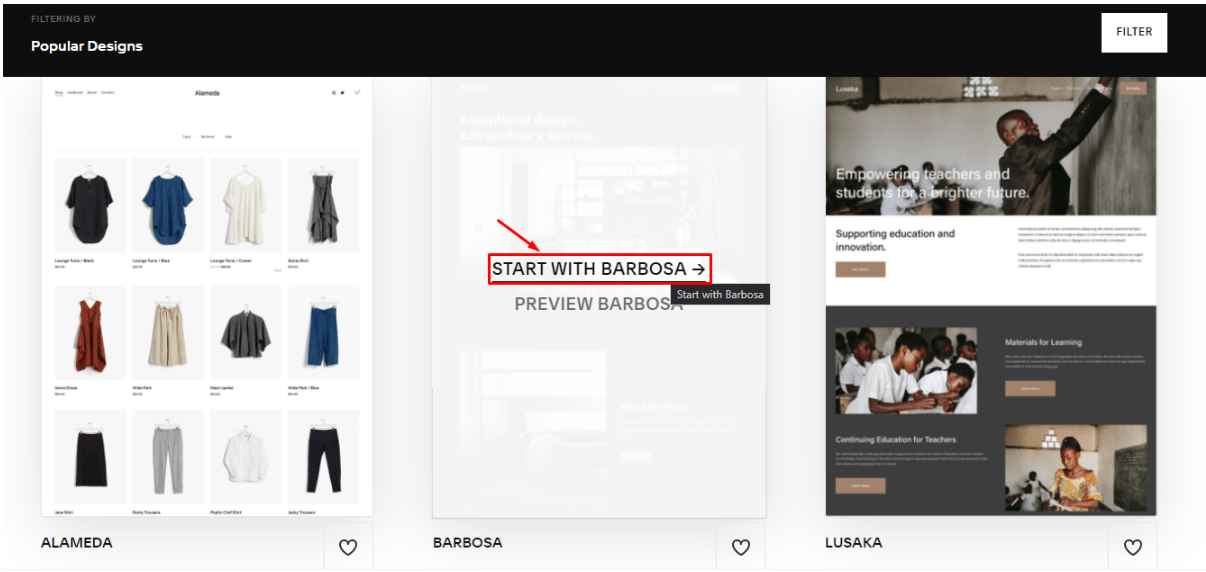
Step #2: Choose a Squarespace template.
Before you migrate your WordPress site to Squarespace, choose a design for your new site. This is called a template, and Squarespace offers many different options.
You can browse through the available templates on Squarespace’s website and select one that matches the look and features of your old WordPress site.
This is crucial because the template will determine your new site’s overall design and layout. So, take your time to choose a template that works best for your needs.
Step #3: Export the WordPress site.
Next, you need to export your website’s content. This means saving all the pages, posts, and media files that make up your website onto your computer.
Head to your WordPress dashboard, and navigate to “Tools” >>> “Export.”
Export all content and save the file to your computer by clicking “Download Export File.”

This will create an XML file containing your website’s content that you can import into Squarespace.

Step #4: Import WordPress content into Squarespace.
Once your WordPress site’s content is exported, you can quickly transfer it to your new Squarespace site.
Here’s how:
Sub-Step #1: Log in to your Squarespace account and select your Squarespace website to go to the “config” page.
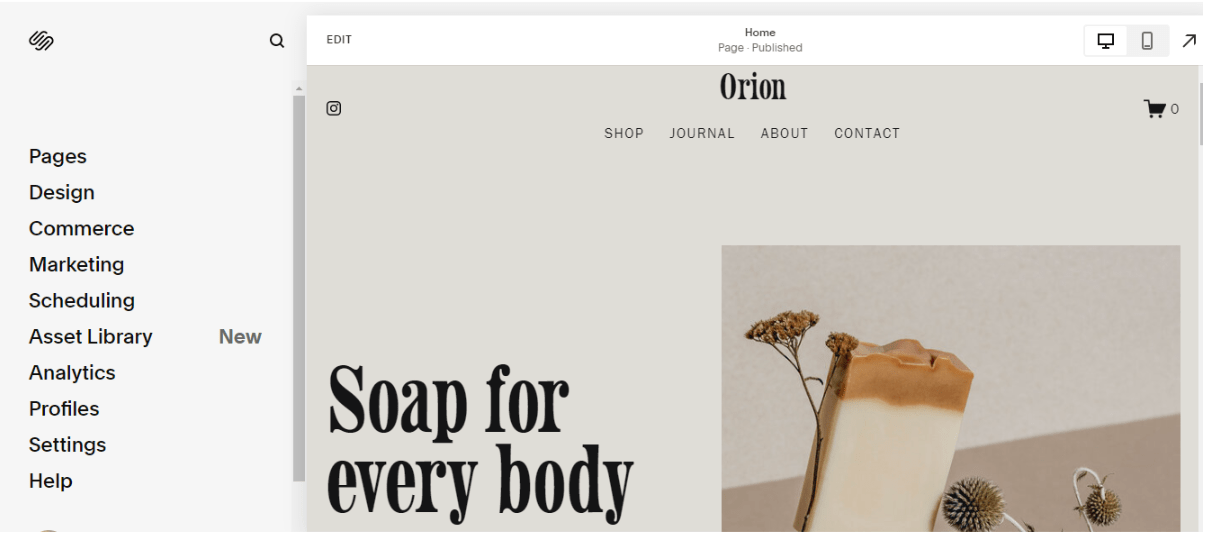
Sub-Step #2: Select “Settings” on the screen’s left side and navigate to “Advanced” >>> “Import & Export Content.”

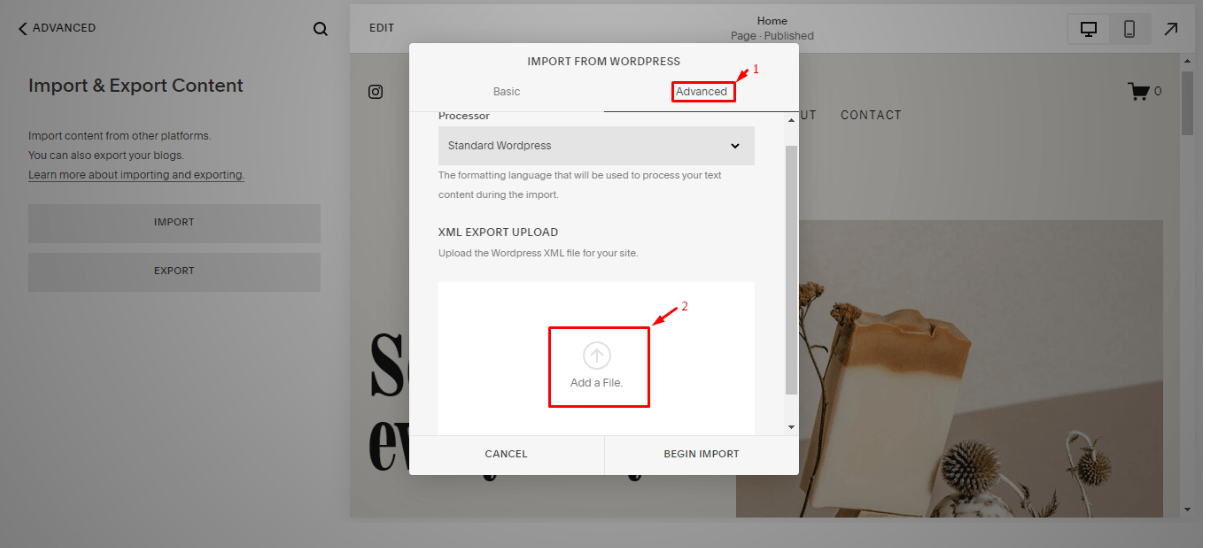
Sub-Step #3: From the “Import & Export Content” menu, click “IMPORT” and choose the "WordPress" option to initiate the import process.

Sub-Step #4: Navigate to the “Advanced” tab, and click the “Add a File” button to upload the previously downloaded WordPress XML file.
Sub-Step #5: Once the file is uploaded, click the “BEGIN IMPORT” button, and Squarespace will initiate the import process.
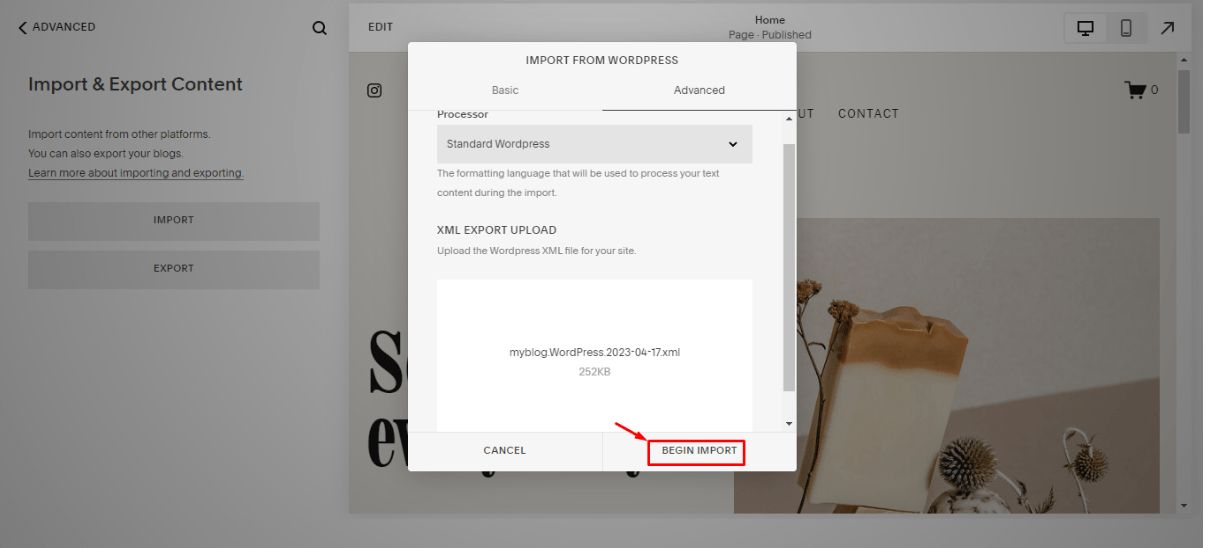
Depending on the size of your WordPress site’s content, the import process may take a few minutes. Don’t close your browser or navigate away from the page during this time.
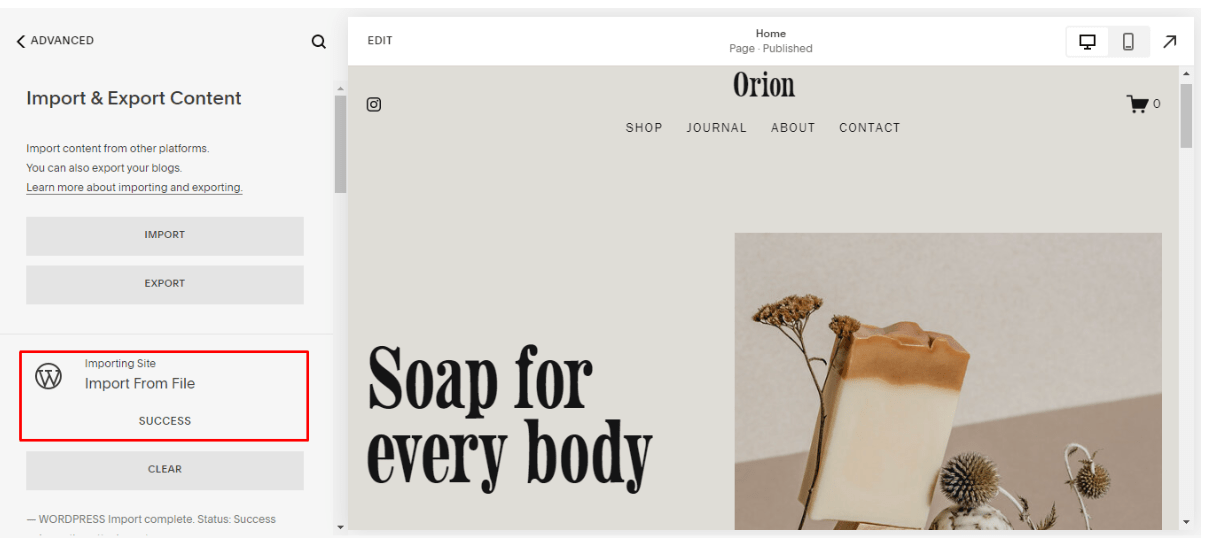
Sub-Step #6: Once the import is complete, you will see a “SUCCESS” status on the “Import & Export Content” panel.
Step #5: Review and edit imported content.
After you’ve imported your WordPress content into Squarespace, it’s time to review it and check if everything looks right. Ensure that the content displays correctly, including any images or media you may have imported.
Additionally, you may need to carry out some edits on certain content to fit the new Squarespace template, including the following:
Adjusting font sizes
Changing image placement
Reformatting text to fit within new page layouts
It’s essential to take the time to make these adjustments to ensure your site looks polished and professional when it’s launched.
And if you decide to switch templates someday, you should use this step-by-step guide to changing templates in Squarespace as a resource.
Step #6: Customize your Squarespace site.
Now that you’ve transferred your WordPress content to Squarespace, you can customize your new site. For example, you can add your logo as a favicon, change the layout, and customize your site’s font and style to look and function how you want it to.
Step #7: Transfer your domain from WordPress to Squarespace.
To move your domain from your old WordPress site to your new Squarespace site, you need to follow these simple steps:
Sub-Step #1: Head to your WordPress dashboard and navigate to the “Settings” menu.
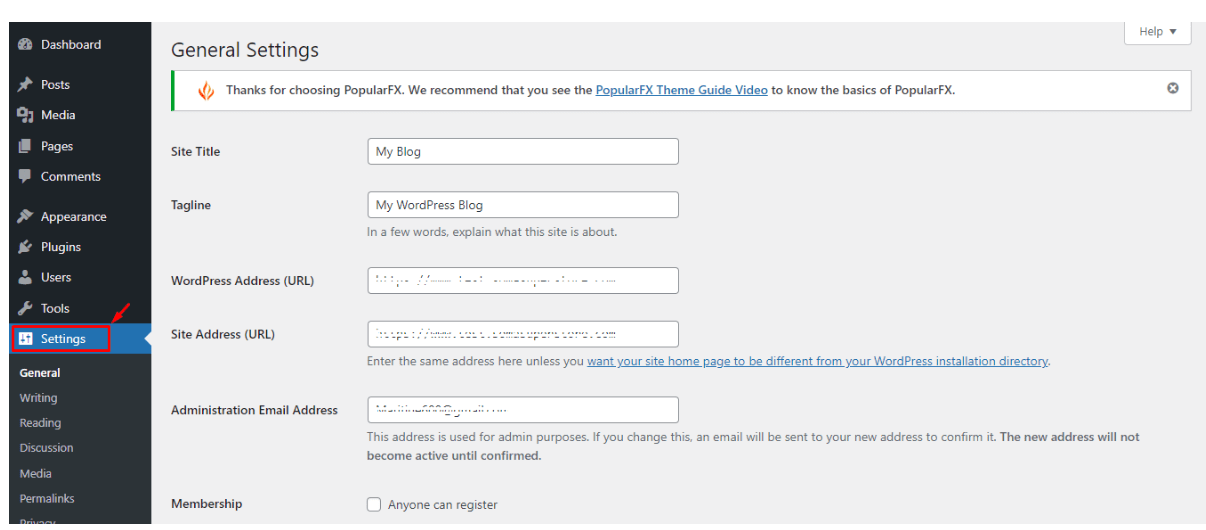
Sub-Step #2: Update your site’s address to a different URL since your Squarespace site will now point to the current address. You can also delete your WordPress site if you no longer need it.
Sub-Step #3: Head to your Squarespace dashboard and navigate to “Settings” >>> “Domains,” and select “USE A DOMAIN I OWN.”
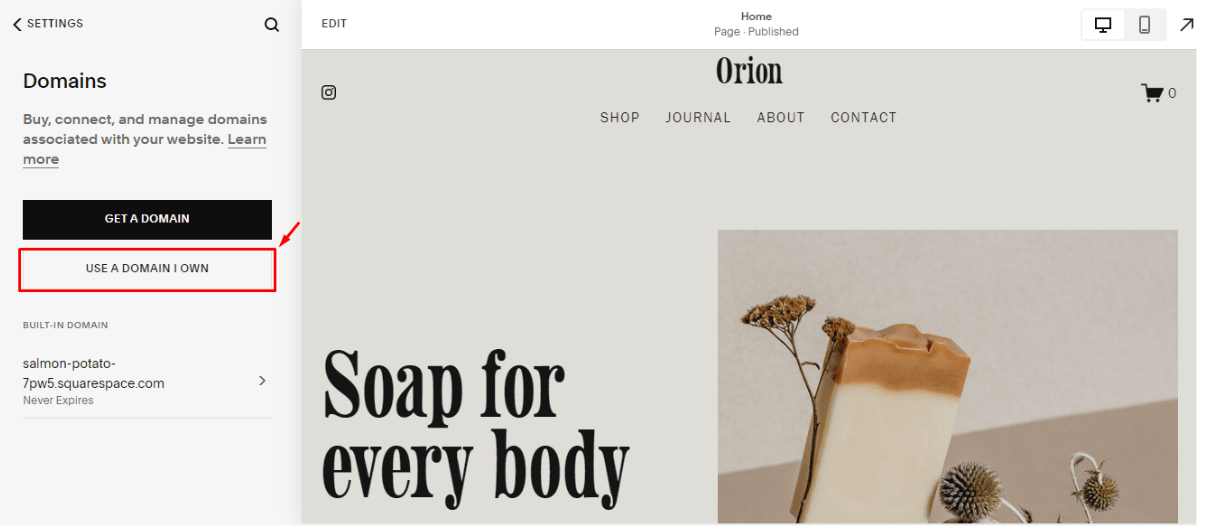
Follow the prompts to connect your domain to your Squarespace site. If your site is hosted on GoDaddy, then this resource on how to connect GoDaddy domain to Squarespace can point you in the right direction.
Your domain will be successfully transferred from your old WordPress site to your new Squarespace site, and your new site will be up and running on your original domain name. You can always change your Squarespace website title at any point if it doesn’t represent your brand.
Step #8: Launch your new Squarespace site.
Now that you’ve migrated your WordPress content to your new Squarespace site and transferred your domain, it’s time to launch your new site.
Here’s how to do it;
Head to your Squarespace dashboard and double-check that everything works correctly.
Ensure your website’s pages, images, links, and other features are functional and displaying correctly.
Once you’ve confirmed everything is working as it should, it’s time to publish your Squarespace website to the web. This will make it available for everyone to see.
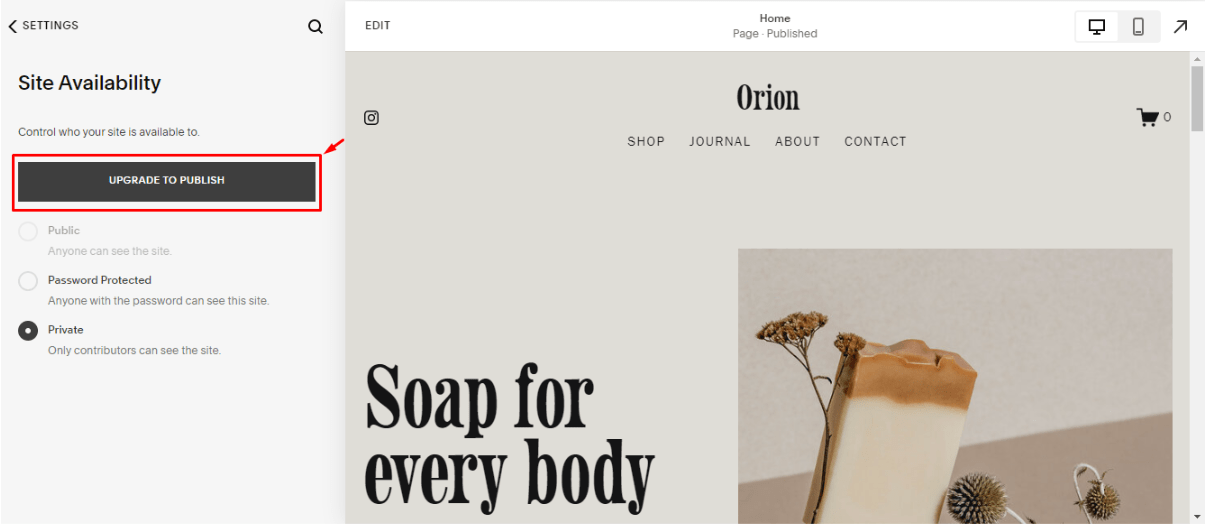
Navigate to “Settings” >>> “Site Availability” on your Squarespace account and select the “UPGRADE TO PUBLISH” button.
You’ll be prompted to choose a suitable pricing plan. Select the pricing plan that works for you.
Complete this step, and your website will be publicly accessible to search engines and public users.
Now, carrying out a WordPress to Squarespace import is just one aspect of the entire task. To ensure your new Squarespace website is visible to the public and ranks on SERPs, it’s crucial to optimize it for SEO, as discussed in the next section.
Optimizing Your Squarespace Website for SEO
Now that you’ve completed the switch from WordPress to Squarespace, you’re probably thinking about optimization for SEO. And yes, it’s true — there are limited plugin and extension solutions on Squarespace. On the bright side, our Yoast for Squarespace is a tool that helps website owners improve their website’s SEO and increase online visibility.
Our free SEO plugin points out common SEO pitfalls like:
Broken links
Poorly optimized images
Inadequate word count
Incorrect meta descriptions
Hard-to-read URLs
When you sign up for our plugin, you also have unrestricted access to video tutorials, a free SEO community, and other helpful resources to help optimize your Squarespace website for search engines. That way, you’re not left in the dark after switching to Squarespace.
What to Do After Migrating to Squarespace: A 10-Point Checklist
Switching from WordPress to Squarespace has benefits, so make a checklist to ensure smooth migration. Here are a few items you should add to your list:
1. Check all pages and posts.
2. Check all images.
3. Check all links.
4. Check all forms.
5. Check all extensions.
6. Check all menus.
7. Check SEO settings.
8. Check eCommerce functionality
9. Check site security.
10. Check analytics and tracking.
1. Check all pages and posts.
It’s highly recommended to thoroughly examine all your pages and posts after migrating from a WordPress site to Squarespace. This will help you ensure everything has been migrated correctly and your website is error-free.
Ensure all your content displays correctly, including text and media. Additionally, check your website’s responsiveness on various devices, such as desktops, laptops, tablets, and mobile devices. This way, you can ensure that your website is easily accessible to all your visitors.
2. Check all images.
After importing your content to Squarespace, you must verify that all your images have been imported correctly and are displaying correctly on your site. To do this, go through each page and post on your site and check if any images have broken links or are missing.
If you encounter missing or broken images, update them manually to ensure your website looks visually appealing and professional.
Note: Unoptimized images can slow down your Squarespace website. So, ensure you check out this image optimization guide on how to resolve this issue. Our SEO plugin can help you point out this issue in the first place.
3. Check all links.
It’s important to review all the URLs on your website after switching from WordPress to Squarespace to ensure they’re still functional. As mentioned earlier, broken links can result in a poor user experience and negatively impact your search engine rankings.
To simplify this task, you can use online tools such as our SEO plugin for Squarespace scan your site and identify broken links. Once you’ve identified broken links, update them with the correct URLs to ensure a smooth transition for your users.
4. Check all forms.
Thoroughly examine each form to verify that all required fields are clearly labeled and that they’re sending data to the correct email address. You don’t want to miss out on any potential leads or customer inquiries due to malfunctioning forms, so take the time to double-check them.
If you want to receive files from your website visitors, see our guide on how to create a Squarespace form for file upload.
5. Check all extensions.
Verify that all the extensions on your site are working correctly after migrating from WordPress to Squarespace. Suppose you encounter any plugins or widgets that are no longer compatible or functioning. Replace them with suitable alternatives or remove them altogether to avoid any issues or conflicts with your site’s functionality. This will ensure a seamless transition and a smooth experience for your site visitors.
6. Check all menus.
Double-check all menus on your website after switching from WordPress site to Squarespace. This will ensure they’re displaying correctly and all links are functional. Take a few extra minutes to manually update any broken menu so visitors can navigate your site without hiccups.
7. Check SEO settings.
Ensuring that your site’s SEO settings are properly migrated is also vital. A reliable Squarespace SEO expert can help you keep a check on your site’s SEO settings.
Here are a few steps you can take to revamp your SEO settings and optimize your site for search engines:
a. Review meta titles, descriptions, and keywords.
Check that your meta titles, descriptions, and keywords have been migrated correctly. These elements are crucial for search engines to understand what your site is about and display relevant information in search results.
b. Use relevant keywords.
Ensure your site’s content includes relevant keywords that your target audience will likely search for. This will help your site rank higher in search engine results pages (SERPs) and increase your visibility online. Our Squarespace SEO plugin can provide relevant keywords alongside their respective search volumes to get you started.
c. Optimize your images.
Use descriptive file names and alt tags for your images to help search engines understand your site’s content. This will also help your images appear in image search results and drive more traffic to your site. The below video offers more tips on image optimization for SEO.
We’ve adequately explained how to optimize your site for search engines in our no-fluff 30-plus Squarespace SEO tips resource. So be sure to check them out.
8. Check eCommerce functionality.
If you have an eCommerce store on your WordPress site, it’s essential to check that your online store functions properly on Squarespace.
Here are a few steps you can take to ensure that your eCommerce functionality is working as expected:
a. Test product listings.
Check that all your product listings have been migrated correctly and that the information is accurate. Verify that all images, descriptions, and pricing information are displaying correctly on your Squarespace site.
b. Verify pricing and tax settings.
Ensure your pricing and tax settings are correctly configured on your Squarespace site. Test that your checkout process calculates the correct total cost of the order, including any applicable taxes or discounts.
c. Test the entire shopping process.
Test the entire checkout process from start to finish, including adding products to the cart, entering shipping and payment information, and completing the purchase. Make sure that the entire process is smooth and error-free for your customers.
d. Check the payment gateway.
If you use a payment gateway, verify that it’s appropriately integrated and that payments are processed correctly.
Note: If you own a Shopify store, here’s how to move your Shopify products to Squarespace.
9. Check site security.
Confirming your site’s security after switching from WordPress to Squarespace is highly recommended. This will help ensure that your website is protected from potential security threats and that your visitors can browse your site safely.
Start by ensuring that SSL certificates and firewalls are correctly implemented, as these are crucial security measures that protect your website from cyber-attacks and data breaches.
Note: Our SEO plugin can help with this.
You may also want to consider additional security measures, such as two-factor authentication, to further enhance your site’s security.
10. Check analytics and tracking.
It’s essential to track your website’s performance to make informed decisions about its development.
After switching from your WordPress website to Squarespace, you should set up analytics and tracking tools to monitor your site’s traffic, user behavior, and engagement. This will help you understand how your audience interacts with your site and identify areas that need improvement.
You can stick with Squarespace’s built-in analytics tools or integrate third-party tools like Google Analytics to get more detailed insights, as seen in the video below.
Don’t forget to test your tracking codes to ensure they’re working correctly for efficient monitoring of your site’s performance.
WordPress to Squarespace Import-Frequently Asked Questions
Can you use WordPress on Squarespace?
You can’t run WordPress and Squarespace simultaneously on the same website, but you can add WordPress functionality to your Squarespace website by creating a new subdomain for your WordPress site. This means you can still use your Squarespace website as your primary site while also having the added benefits of WordPress, such as its extensive selection of themes and plugins.
Can you transfer WordPress to Squarespace?
Yes, you can transfer a WordPress website to Squarespace using Squarespace’s import tool. You need to export your WordPress site’s content as an XML file and then import it to Squarespace using the import tool. However, the design and functionality of your website won’t transfer automatically, so you’ll need to rebuild and customize your site on Squarespace.
Is WordPress easier to use than Squarespace?
No, WordPress is not easier to use than Squarespace. Squarespace is generally considered easier to use because it has a more user-friendly interface and doesn’t require coding knowledge. On the other hand, WordPress presents a steeper learning curve and can be more challenging to navigate, particularly for first-time users.
If WordPress isn’t for you, it might be worth weighing up Wix Vs Squarespace.
Wrapping It Up
The decision to migrate from WordPress to Squarespace is a huge one requiring you to consider many factors before making the jump. This comprehensive guide outlines how to import a WordPress blog to Squarespace, albeit with some planning, perseverance, and the innovative SEOSpace plugin. That way, you can enjoy the security, scalability, and stunning design potential Squarespace offers.
Whether migrating from WordPress to Squarespace is the right move or not depends on the kind of website you’re running and the features you’re after. Still, there’s very little not to like about Squarespace. And with our Yoast for Squarespace, you have even more control over your website’s SEO abilities, allowing you to maximize your site’s search engine ranking potential. You’re also eligible for a free SEO audit from us when you finally switch to Squarespace.
In our opinion, migrating from WordPress to Squarespace is worth it!